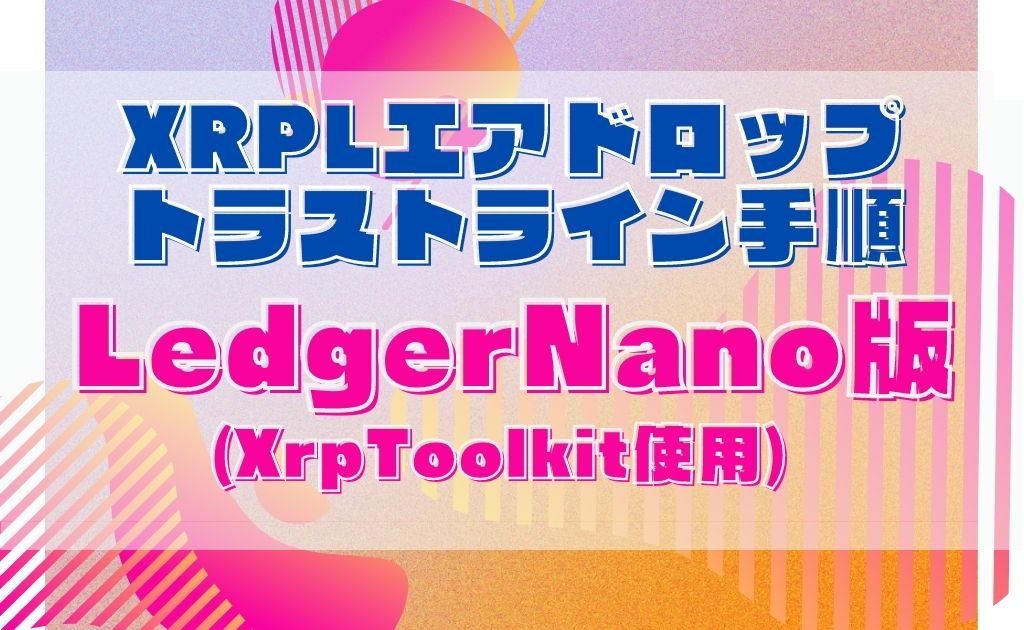
【LedgerNano】XRPLトラストライン設定用HEXの調べ方
あやママ あやママブログ


xummアプリでtipbotを利用可能にする手順です。
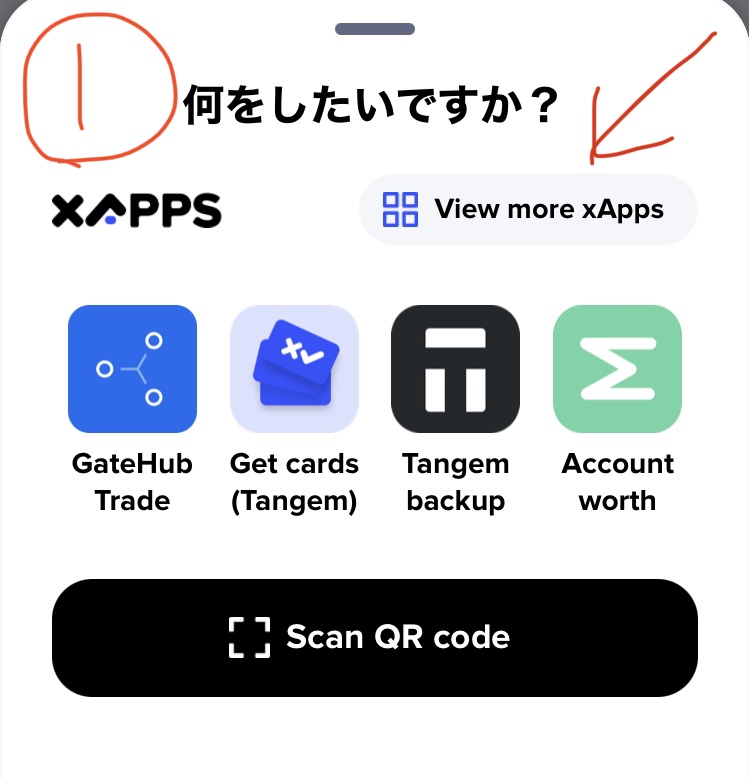
0.xummを起動し、メニュー真ん中のロゴアイコンをタップ

1.「View more xApps」をタップ
2.XRP Ledger TipBotをタップ

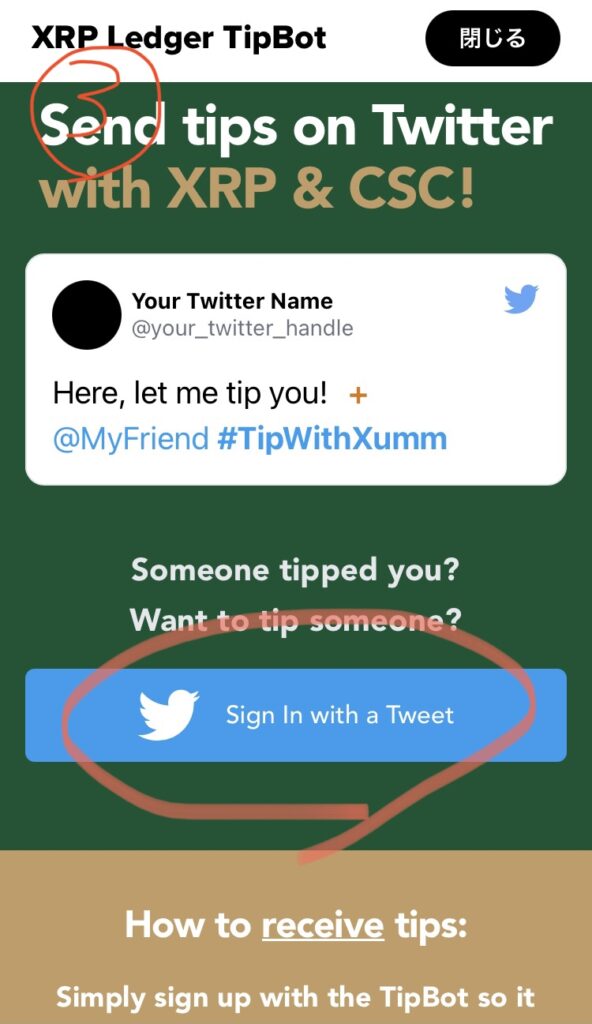
3.Sign in with a tweetをタップ
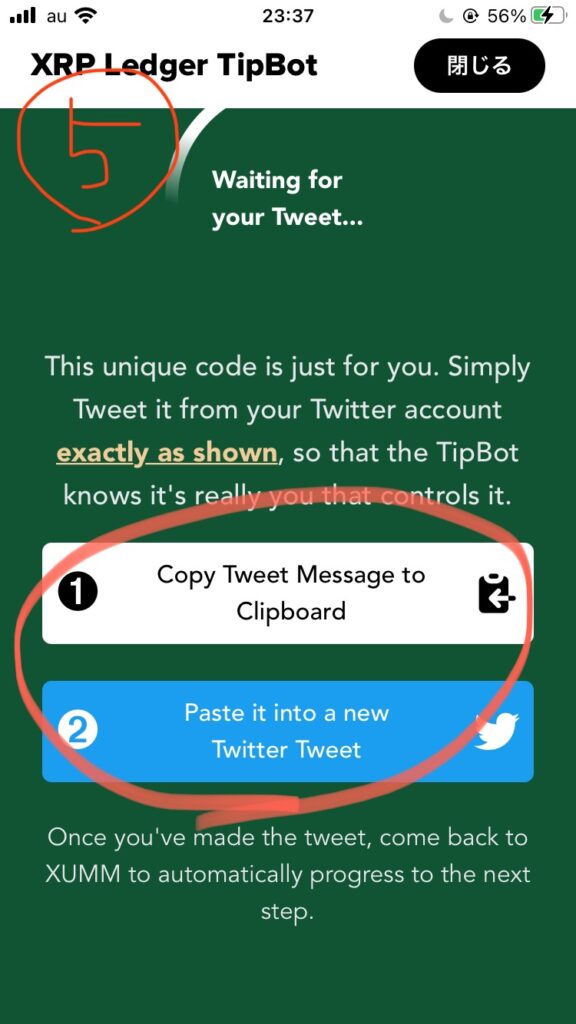
4.個別に発行されるレジストレーションキーを確認
※次の手順でコピーできます
5.レジストレーションキーを含む文章をコピーし、ツイートする
6.Twitterと連携できたらxummの認証に進む
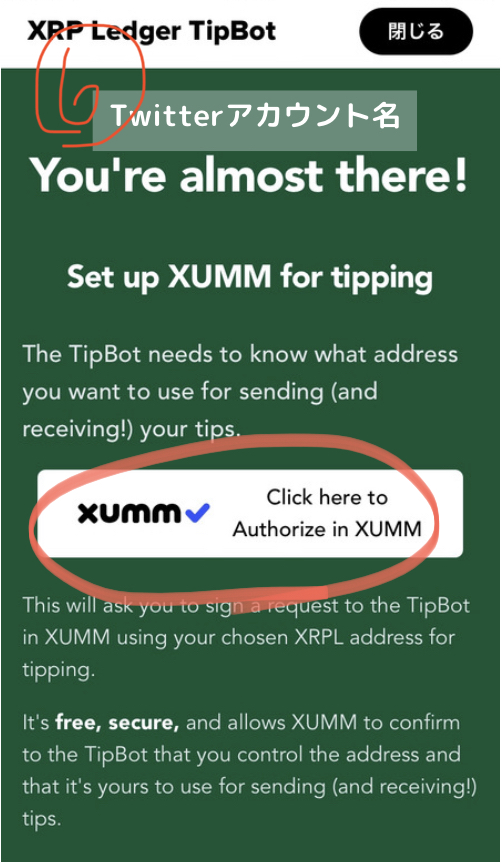
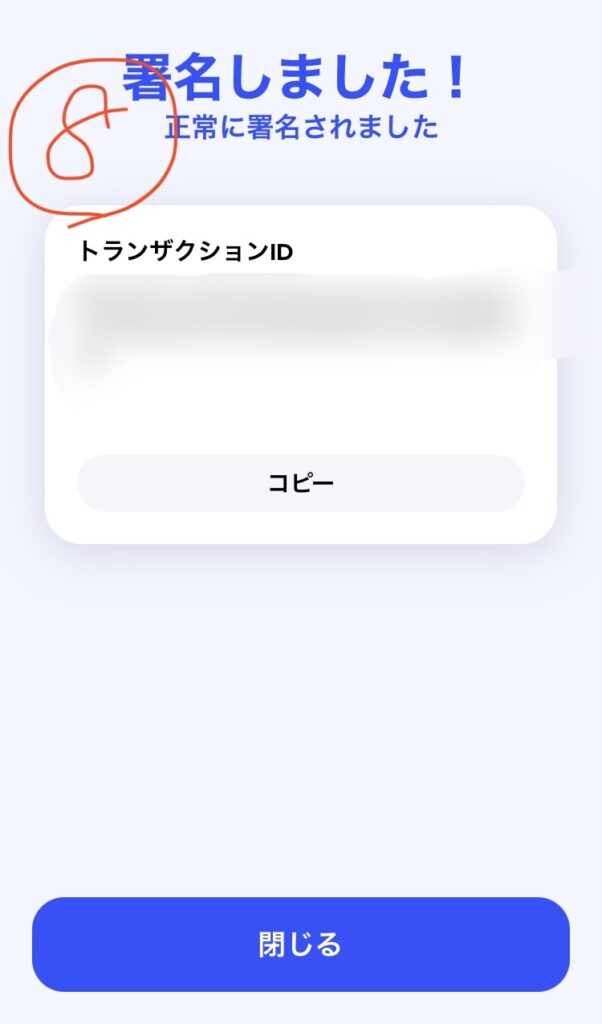
7.tipbotの送受信に使用するxrpアドレスを確認して認証
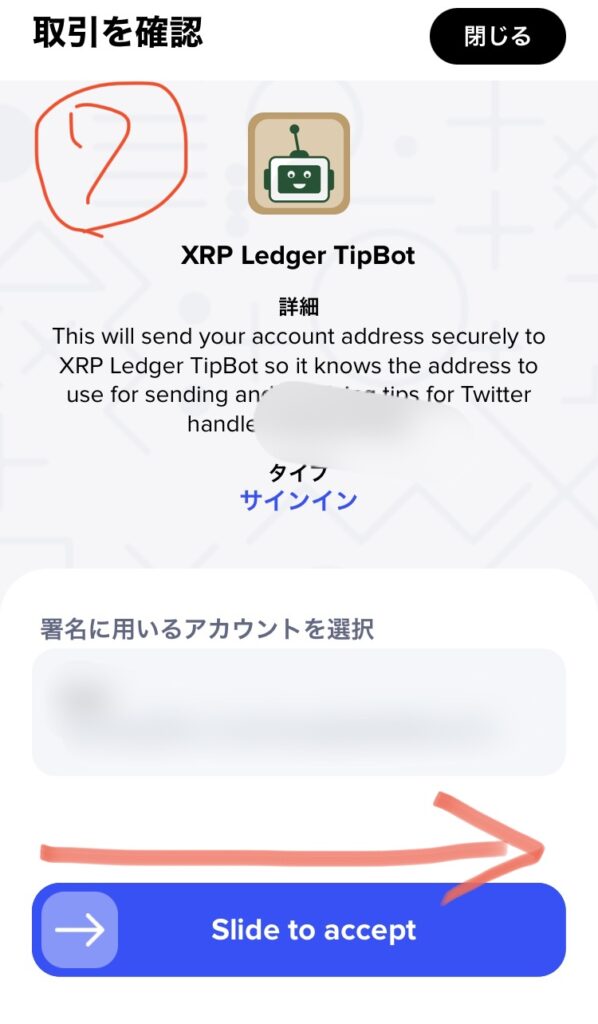
8.認証が完了したら「閉じる」
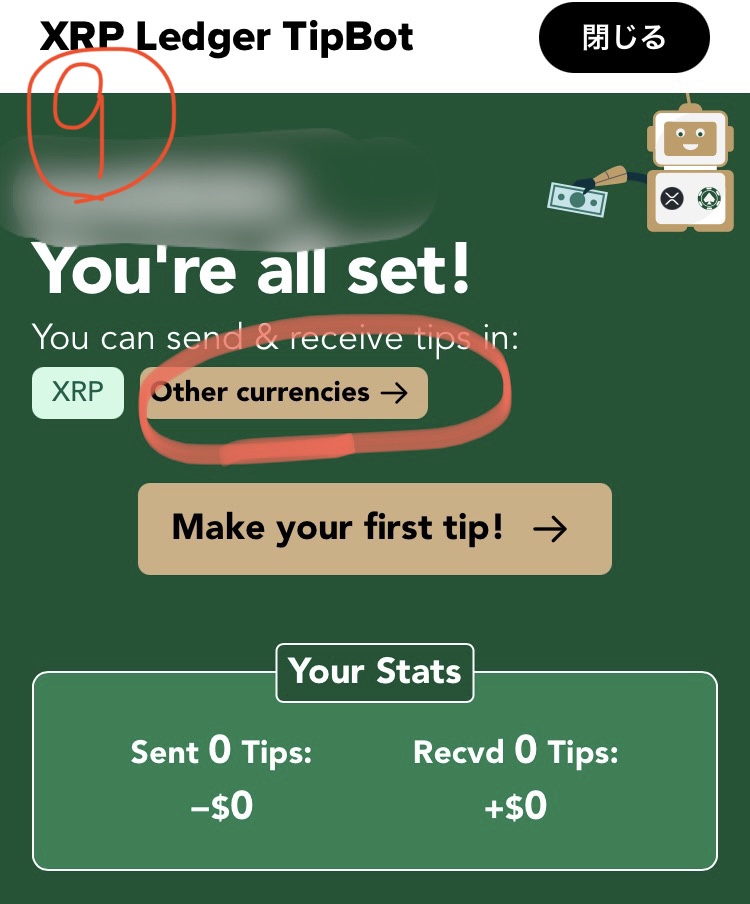
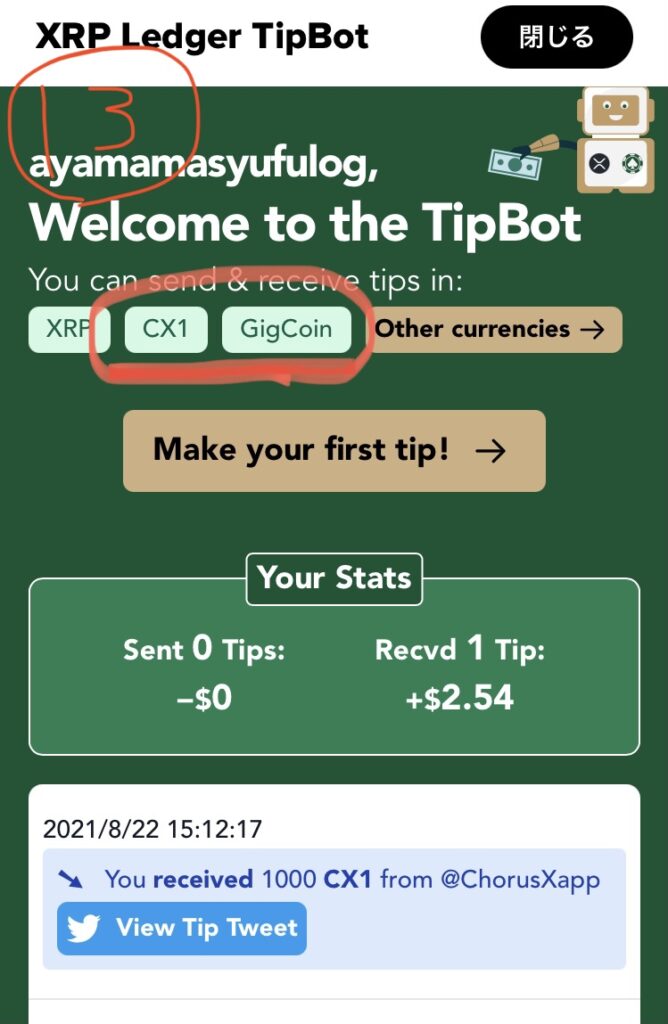
9.これでxrpをtipbotでやり取りできるようになりました。
続いて「Other currencies」をタップ
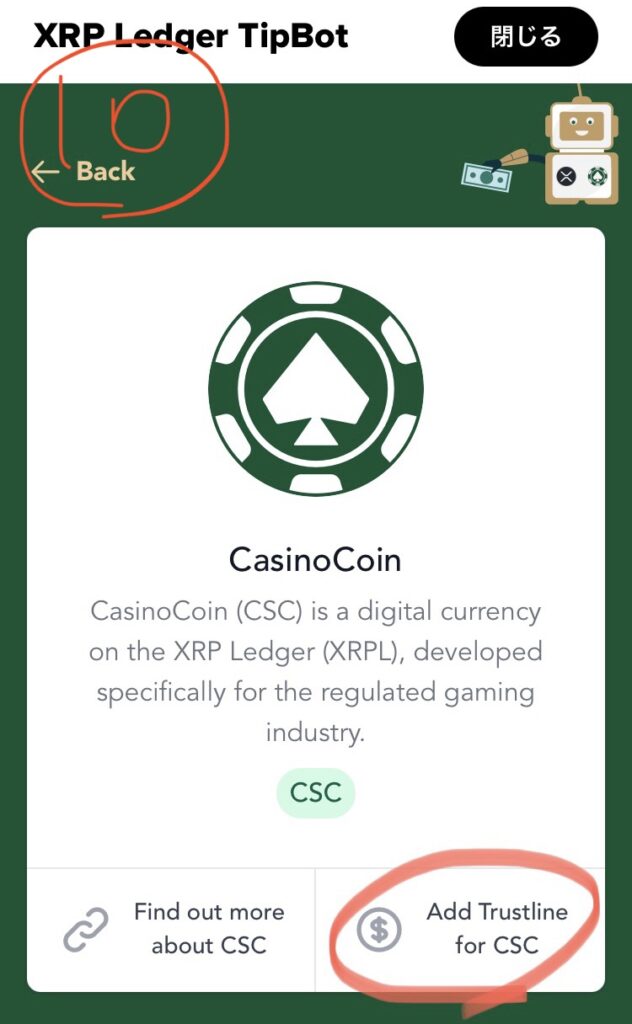
10.一覧にある中から追加したいトークンを選んで「Add Trustline for トークン名」をタップ
11.スライドして認証
※画像が手順10のトークンと違ってすみません。。。

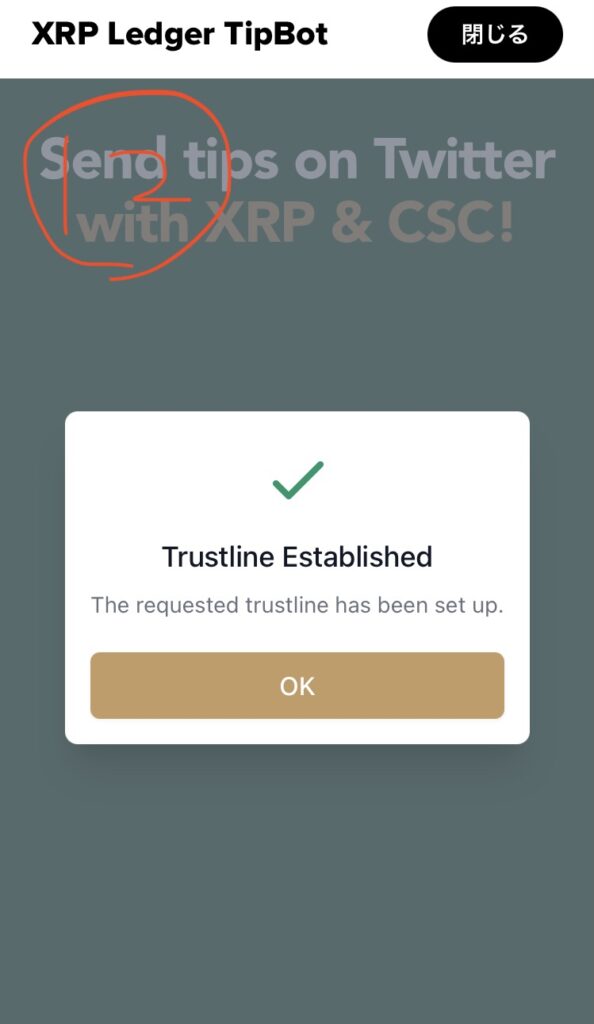
12.認証されたらOK
13.追加したトークンが表示されています
以上です!!
取り急ぎ作成した手順なので、間違いなどあれば@ayamamasyufulog宛にDM頂けると助かります(^^;

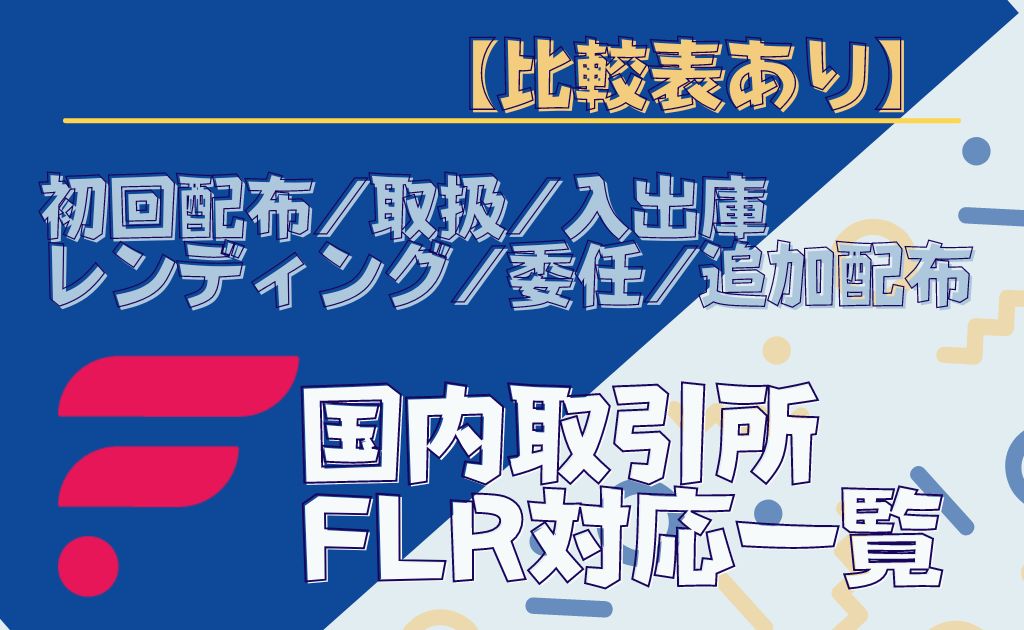
FLR関連取扱いサービス
ラップ&デリゲート代行
入庫(100万FLR~)
現物売買
ステーキング
その他口座保有のメリット
対象銘柄を保有するだけで自動的にステーキング運用
対応銘柄:ETH、DOT、ADA、XTZ、SOL、AVAX、OAS、ATOM、XDC、FLR
暗号資産評価額を証拠金としたレバレッジ取引可能、スプレッドも狭い
日本円でNFT売買が可能!SBI Web3 Walletが使える

FLR関連取扱いサービス
ラップ&デリゲート代行
入庫(100万FLR~)
現物売買
ステーキング
その他口座保有のメリット
対象銘柄を保有するだけで自動的にステーキング運用
対応銘柄:ETH、DOT、ADA、XTZ、SOL、AVAX、OAS、ATOM、XDC、FLR
暗号資産評価額を証拠金としたレバレッジ取引可能、スプレッドも狭い
日本円でNFT売買が可能!SBI Web3 Walletが使える
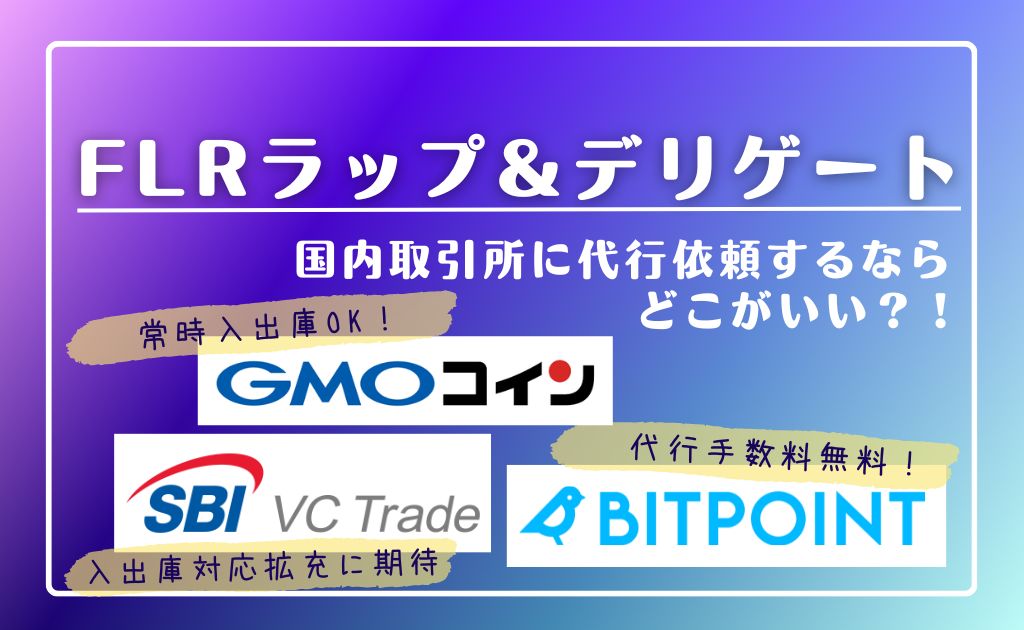

◆FLRの入庫と追加エアドロ&デリゲート報酬代行両方に対応

◆追加エアドロ&デリゲート報酬獲得手数料無料
◆全自動で税金計算!
◆日本正規代理店安心の日本語サポート有!
◆公式サイトならカラバリ豊富!